 |
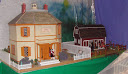
| La Malcontenta, an Art Deco Spanish Eclectic house, with its porch and veranda. |
I decided to work on
La Malcontenta. I was excited to finally see how the exterior features I had planned a couple of years ago would work out. (
Sunnybrook Farm will go on for the rest of my life, but some others have to finish! And I decided that I needed a little break from
Sunnybrook. Of course, Fred is clamoring for his workshop since his table saw arrived.)
The Porch:
I finally finished the front steps—the porch landing was started about two years ago and then work stopped! Ye gad! I bought these great porch tiles from
Michael's and it was a good thing that I bought many of them since they are no longer available.
 |
| Porch tiles on landing. |
 |
| Completed porch at last! |
The Veranda:
I had always planned to have a veranda on the living room side of the house and I decided that it was time to do this, too. After all, these great Palladian doors needed to open onto something.
 |
| Living room needs a veranda. |
 |
| The veranda goes here. |
The veranda is designed with arches (as is the front porch) but with a Spanish barrel tiled hip roof to match the house.
A Note about the Spanish Barrel Tiles:
These are vinyl sheets that I buy from
HBS. There is a lot of waste with a hip roof, so many were needed for the house--and for the mistakes in measuring and cutting. The veranda roof took three sheets. The house took at least 15—my sister and I stopped counting after a while.
The sheets sometimes crack as you cut them but are easily repaired. The sheets come from different dye lots. The barrels may be slightly different sizes from sheet to sheet which makes vertical and horizontal alignment a challenge. There sometimes is a problem making a neat seam and I have found that overlapping a row often makes the best seam.
The sheets are white underneath so that you have to paint the edges and the seams.
 |
| Painting the edges and seams. |
Also, I trim the edge that will be the first row to give the illusion that the barrels have thickness.
 |
| Cut the first horizontal rows to give the illusion of thickness. |
I also had to paint the edges of the MDF roof pieces. Buy a quart of terra cotta paint (or as I did—find it in the OOPS cart at
Home Depot).
They need a lot of glue under them and “support” to keep them in place as they dry (they slide). I have used
E6000,
OmniStick, and
Aileene’s 7800 with equal success. After they are dry, I touch up the seams and other “imperfections” with red oak or mahogany
Elmer’s wood filler. Then I paint them.
On a hipped roof (my only experience), the edges where the angles meet must be covered with something—the best alignments are never perfect , and also real houses have a protective layer at those points. I use a row of barrels from a sheet made from a company that no longer makes them. The great thing about their sheet is that the barrels are wider and so cover angled edges better. I do not know what I will use if I do another barrel tiled roof. I accept these quirks and will continue to use these sheets--or at least until I find something better.
The Veranda Construction:
The veranda is a stand-alone piece with its own landscape. The house is big enough without having it attached.
The veranda footing is pine, the porch and roof are ¼ inch MDF, and the arched walls are cut with my jig saw from 3/8 inch Baltic birch plywood. The back wall of the veranda is the house. The veranda is glued together with
Elmer’s Wood Glue.
 |
| Glued, clamped, leveled, and prayed over. |
 |
| Walls and base glued and stable. |
The veranda is stuccoed with the same product as the house—
Behr’s Sand Textured paint from
Home Depot. I put in on with a palette knife or other spatula. It needs at least a day (or more) to dry thoroughly. Before it is dry, if you don’t like the look, you can scrape it off and start again.
 |
| Stucco from real house textured paint. |
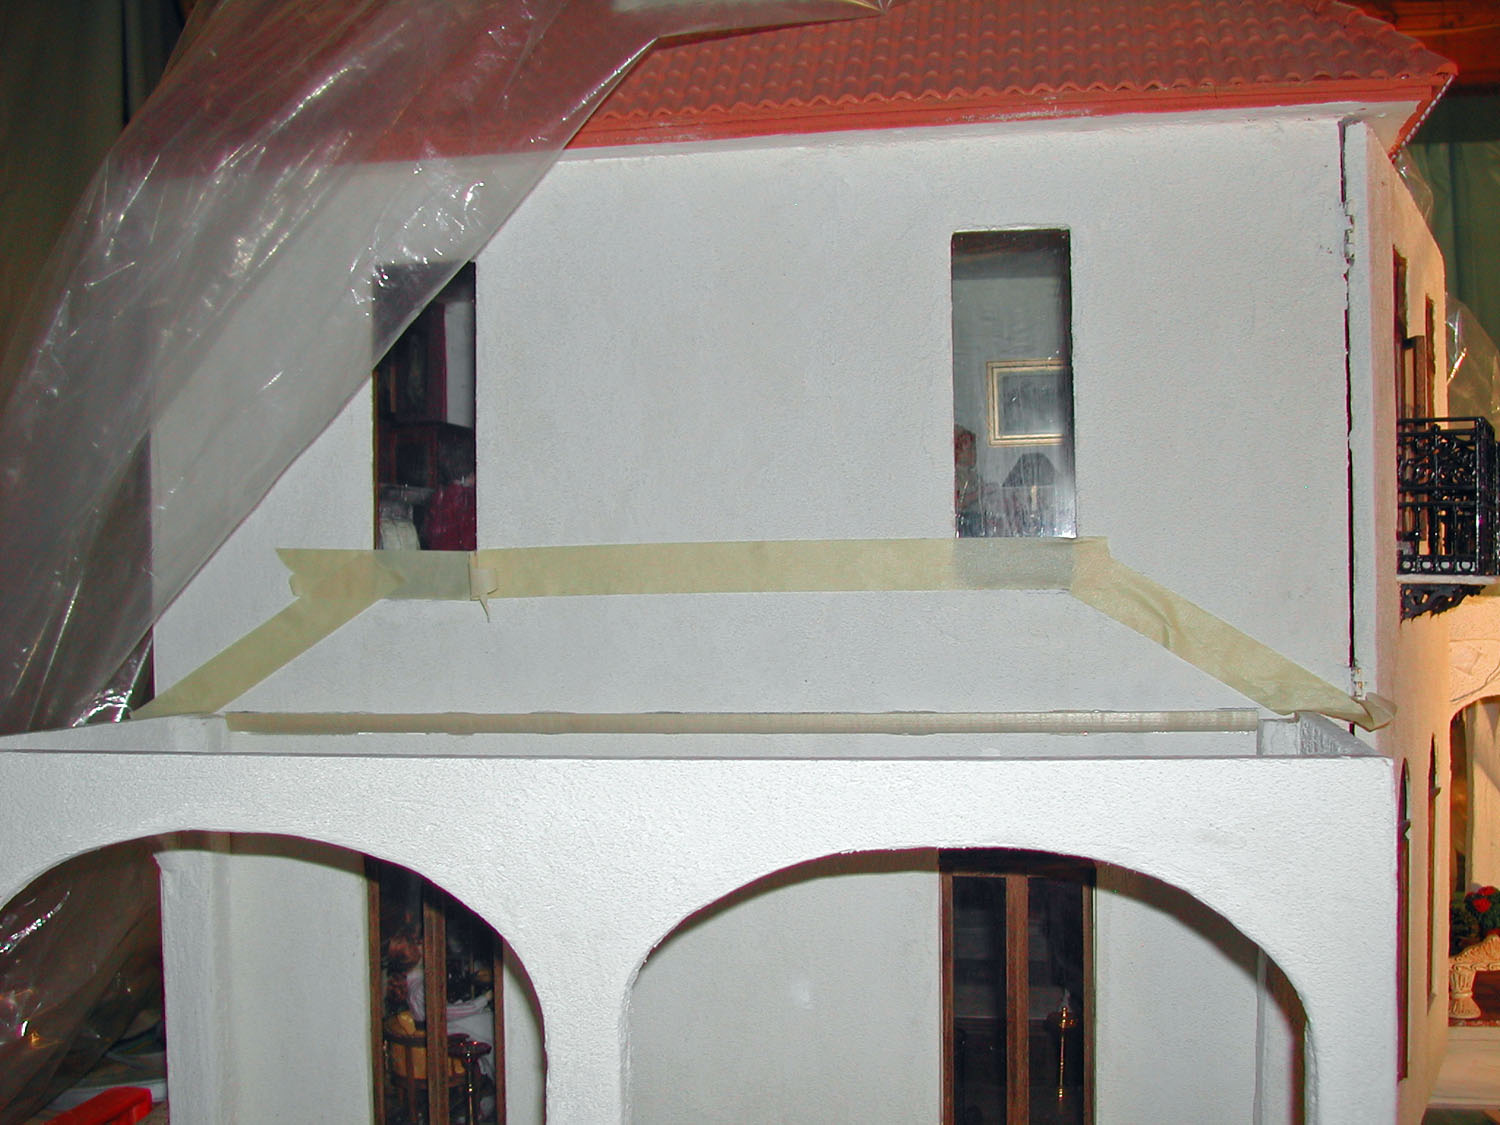
Next we had to decide on the pitch of the roof which ended up being slightly above the bottom of the den windows.
 |
| Pitch marked with masking tape. |
A flat bottom roof goes on first.
 |
| The hipped roof starts with a flat base. |
The veranda roof needed little cut-outs where the den windows are because the pitch I wanted came above the bottom of the windows. I designed cutouts with a “shelf” at the window level on which to put a window box and made curved “wrought iron” railings for the windows to add extra interest to the area (detailed picture later).
 |
| View of window cutouts and painted edges of the roof. |
The main section was stabilized against the flat bottom with wedges underneath and straight pieces across the back, and then the side pieces were glued on and stabilized. Remember that this veranda is a stand-alone and gets no support from the house. When the roof was secure, it was time to glue on the tile sheets.
The tiles are held in place until they are dry. Believe or not, the bricks and some support in front kept the top tile sheet from moving. (On the main house, the pitch was so great that I had to use temporary nails as well as a lot of masking tape every which way. Also, I had to glue in small sections. )
 |
| Looks weird, but it works! |
The sides just needed some push pins for support.
 |
| Push pin supports |
And the roof is done, touched up, and painted!
 |
| We did it! |
Close-up of the cutouts with the window boxes with curved black window railings on the den windows for added interest.
 |
| Very interesting solution. |
The veranda tiles are from real house wallpaper from Home Depot (when HD used to sell wallpaper).
 |
| Real house wallpaper = mini tiles. |
 |
| Eureka!!! |
The porch floor tiles are glued to the floor with
YES glue.
Time to catch one’s breathe!
~~~~~~~~~~
There will be “wrought iron fencing” in the front and back arches, and following along the grass. This fencing is a commercial black plastic fencing from a local dollhouse store. The veranda will face a green lawn made on a styrofoam base with a
Heiki or
Noch grass mat. The veranda itself is 10 ½ x 23 inches.
I decided to, once again, unpack the furniture and place it on the veranda, and scotch tape the fencing in place to photograph an "almost" finished look.
 |
| Guests have already arrived! |
 |
| But where are the home owners? |
 |
| Well, a good party doesn't require a host and hostess -- just good food and cool drinks! Cheers! |
This area and the area around the house have yet to be landscaped, but I am making progress.


Wow! You are certainly putting the work in! Love it and all the little things that make up such a lovely verandah!
ReplyDeleteNice job on the veranda. I like the idea of using wallpaper for the floor. You did a great job with the window boxes where the tile meets the windows too. I also like the furniture you chose for that space.
ReplyDeleteThe work is really outstanding..
ReplyDeleteExcellent..
I love it..!!!
Hello Iris,
ReplyDeleteI have to say, this is one of the most inspiring projects I've seen...ever. Before I started Dewell Manor I was almsot ready to purchase the Thornhill., it's always been one of my favorite houses. To see what you were able to do with the kit is astounding. You did such a fantastic job and I just love, LOVE, REALLY LOVE, the way you let your imagination run wild.
Congratulations, this really is one of the greatest examples online of transforming a kit into something very persanol...did I say how much I love it and how well it came out...
Big hugs my friend,
Giac
Hi Iris! For some odd reason there are quite a few Mediterranean-styled RL houses here in Minneapolis-St Paul, and I ADORE them! So naturally I am in love with your La Malcontenta!
ReplyDeleteThe exterior is enchanting and I look forward to seeing more of what you have done to the interior!
¿Dónde está mi Margarita?
Wow! What a fabulous house, it really is beautiful and I would just love to live there if it was RL, or even if I had some drink me juice.
ReplyDeleteSo much thought and hard work has gone into it and i just LOVE those doors, the tiles and beautiful archways, just divine!!
ML Fi xx
I love this. Spanish style (real size)houses are very rare here. It's so nice to see a different approach to the TH. You did a wonderful job on the roof, veranda and entryway.
ReplyDeletecette maison est réellement une maison du soleil, avec sa très belle toiture rouge et les arches du porche.
ReplyDeleteMinima
cette maison sent bon le soleil, avec sa jolie toiture rouge et les arches du poche.
ReplyDeleteMinima
Wow, Iris! This is Another Amazing House! I LOVE the Veranda! I have never worked with the plastic tile roofing sheets... but it looks as though you overcame all their challenges with Great Imagination! I like the window recesses and the little window boxes as a solution! I Look forward to seeing more of this house!
ReplyDeleteFabulous! What wonderful work you do! :)
ReplyDeleteWhat a great house! I like the way it has been finished, the roof tiles look good, not seen anything like that available here in UK. The porch adds real character to this house too. Your dolls look quite at home on their new veranda too!
ReplyDeleteregards
Andy xx