It All Starts Here

Sometimes our ideas flow from an existing kit to bash, a house style to scratch (aka custom) build, or from an interesting doll who needs a place to live. Our settings are always modern-day (ca. 2001 when we started this hobby). We try to create things that will make people smile and feel good.

We think that if we had to build the same house twice, we literally could not do it! Fortunately, we have very unique little people who have definite opinions and so far, no one has wanted a house “like so-and-so” has.

We work as a family unit: my wonderful husband, my beautiful sister, and I. We don't always agree as to the direction of the build, but I think that we end up with a better dollhouse because of all our grumblings -- and we do have a lot of fun!

The Purpose of this Blog

We needed a place for all we wanted to say about the background of the build and the nuts and bolts of the design and build process. Thus this blog.

All our dolls' homes have families living in them and a story is built around their personalities and lifestyles. This story is an integral part of our building process. We would like to share these stories -- actually, the little people insist upon it!

Many of our houses are located in Fredericksburg, Virginia because that is my sister's favorite place.

Also, we have started a Rouges' Gallery with photos of our little people and information about the dolls.

If you would like to start with the dollhouse that "started it all", it is the Original Rowbottom Manse; if you would like to see the scratch-built Georgian that our first build gave us the confidence (or fool-hardiness) to do, it is Sunnybrook Farm.

Let the stories begin!

~~~~~~~~~~~~~~~~~~~~~~~~~~~~~~~~~~~~~~~~ ~~~~~~~~~~~~~~~~~~~~~~~~~~~~~~~~~~~~~~~~

Monday, December 26, 2011

Behind the Build (#1): Abner Raleigh House, Williamsburg, Virginia.

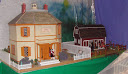
The William Lightfoot House, constructed before 1782, Williamsburg, Virginia. (This photo and the next two are from Colonial Houses: The Historic Homes of Williamsburg by Hugh Howard.)

View from other side. This is a good view of the details of the front with its Mansard roof.
 
Floor plan of the house, more or less present day, but with the structure (size, interior walls, fireplaces, etc.) of the original, to the best of my knowledge.)

A step back in time (Fall 2008):
Back in the fall of 2008, I was in a funk because the dollhouse I wanted to buy from DHE was no longer being made and the RGT one that I could have used as a substitute (with modifications) was too expensive. It was to be a glorious Edwardian. It wasn’t as if we didn’t have houses to finish, it’s just that I like to be thinking of the next project, be it however far down the road. Thinking about the next house is always relaxing – no pressure to start it; no pressure to finish it--just something to think about while watching the grass grow.

While I was in this “bad mood”, I decided to re-read Colonial Houses: The Historic Homes of Williamsburg (by Hugh Howard and published by Harry N. Abrams, Inc. in 2004) as therapy. (I love the houses and gardens of Colonial Williamsburg.) All of a sudden, on page 107, my eyes rested upon the most delightful little colonial -- the William Lightfoot House (constructed before 1782) on Duke of Gloucester Street. This house was nothing like the Edwardian that I had wanted to contemplate, but I was charmed! To heck with dollhouse manufacturers and their whims, I would just scratch-build. I discussed this with my family and they immediately wondered where we would put this house--but for the moment we didn’t need a spot since this was a house for planning and daydreaming!

The build of this house will follow our usual: my husband cuts the wood (the woodworker’s shop also offered to cut some of the wood), I build, and my sister furnishes.

Design Features:
The design and floor plan of the William Lightfoot house was used as the model. I will take the spirit of the house but make some changes as my whimsy takes me. I wanted to keep the house small and I thought I could keep the footprint at 24” wide by 28” deep but the kitchen addition required a “bump-out” to have a proper size. I didn’t like this look, so the house grew to 28” x 28”. Besides the photos from the book, I have actual plans and historic references to the house from various Virginia archives and the Library of Congress.

The house will open front and back for the main floor, and the Mansard roof will flip up. I am considering a two-door opening front: one from the left edge to the hall wall and the other from there to the right edge. I still have a lot of thinking to do for how the house will open on the main floor since there are porches front and back

The house is being built from 3/8” Baltic Birch plywood. The house is two rooms deep. The outside will look as close to the William Lightfoot house as possible. MDF clapboard siding (from HBS) will be used on the exterior and the roof will be wood shakes. I will build the corner fireplaces, or I may buy them from Jim Coates on eBay. (I love his fireplaces). I will buy standard “pinned” doors and change them to hinged doors. The ground floor windows have been purchased from the Dolls’ House Emporium and are 6/6 wooden, working windows. I had wanted to use Timberbrook 6/6 wooden working windows in the attic, but the company seems to be no longer--too bad, the company made great products. Since the roof is a Mansard, I will build my own dormers; I think that this is easier than trying to modify the size and slope of the standard commercial 45 degree dormers. I had to do that once before for Hawthorne’s Rare Books bookshop, and was doable but tricky

Fast forward to the present (December 2011):
I have been following a numbers of builds of houses this year and I am thinking of a build also. I have much to do yet on a number of my houses but…so I have pulled out my project notes (transcribed above) for William Lightfoot. Since this house is in private hands, I am calling mine the Abner Raleigh House and it will be, as all my houses are, set in the present, and as a renovated ca. 1792 house.

Shortly, I will post some more pictures.

Irony:
A couple of years ago, my sister surprised me with a RGT Foxhall Manor so that at some point in time I could have my Edwardian! It is lying flat in its boxes under the guest room bed until its time comes.

Saturday, December 24, 2011

Reflections on art work

My goodness, life has been a blur since Thanksgiving! Once I did Sunnybrook for the holidays, I got into a "musing" mode and just drifted.

One area that had a lot of thinking time was the purchase of "artwork". I found a number of nice vendors on eBay and I already have a bunch of the Jacqueline pictures. One thing I noticed immediately was that it is not easy to mix and match paintings from different vendors. The size and type of the frame, the type of paper used, and the printing process varies quite a bit. This, added to trying to compose harmonious groupings of pictorial content, could drive a person crazy. Sometimes, one can carefully merge vendors, but when this fails--one room, one vendor; and then pick groupings from that vendor.

The next sticky points are that some of the commercial paintings are not the size I want, and some of my favorite painters' works are not to be had. With regard to sizes, I like my paintings to be scaled from the "real" size, unless I need it in a different size, but still keep the aspect ratio. The other point is that the colors are "off". I love Van Gogh but his colors often lose "in the translation", plus I can't find many of my favorites. Edward Hopper's work is sadly missing so far. Also, often I find a painting I like but not any for companions!

OK, enough grumbly ... what to do? I am buying DVD/CD-Roms of artwork (eBay and Amazon), cutting pictures out of magazines (mine), and scanning artwork from books (mine and the library's). In the spring I shall take trips to my favorite museums in New York City and browse the giftshops. They often have postcards with great artwork on the picture side. I have the start of a large collection.

My collection will be printed as needed on my Epson printer. I can adjust the size and get the colors as correct as possible on my system. I print onto good quality cardstock or matte presentation paper. Posters are printed onto semi-glossy photo paper. Artwork is then glued onto another layer of cardstock, illustration board, or Bristol board--I am still experienting here. If I decide the artwork needs "brush strokes", I use gel medium. I am experimenting between little brush strokes and stipling. Some of my friends put a light spray of "lacquer" as a final coat. I think I may just use a gloss gel...We'll see.

Another solution for printing is to "outsource" it to Staples. My friend puts the artwork in a Word document and emails it to them to be printed as photos. She then picks up the printouts.

Friday, November 25, 2011

Led Lighting - first try

I did buy some individual LED light fixtures. There are some very attractive styles available. The lights are expensive, but they don't have to be wired in and can be placed at a moment's whim. They use an individual battery. We are paying for convience. The LED strip (as sold by RGT and HBS) is also very expensive.

I have a few concerns about the fixtures: they are heavy, some of the styles are a little bigger than I would have liked, and the bulbs put out a harsh white light. Solutions: The light may require gluing in place if the sticky pad gives out, and the bulbs can be painted with Gallery Glass of some color (amber was recommended). Gallery Glass peels off if one doesn't like the color and one can try again. Perhaps shortly, the manufaturers will use a softer light bulb. With regard to the size of the light--have to live with it.

I think that this type of lighting fixture should take off like hotcakes! While the light is pricey, and once every couple of years may need a new battery, there is no cost for tape or round wire, grommets, transformers, junction splices, all the other unnamed tools and "paraphernalia", and the blood, sweat, and tears!
-=-=-=-=
Well, I tried painting the LED fixtures with Gallery Glass and I guess it is an improvement but ... still not crazy about the light color. I did buy a lovely outdoor LED light for Casa Lobo that comes with an amber colored light. I like this light. I saw some other LED lights that have a softer light.
-=-=-=-=
I finally tested the LED strip lighting made by RGT. I bought the "bright white" color and it is very nice. I will also buy the "warm white" color. In some situations, one color light will be preferred over the other. I like the idea that you can use one or as many LED sections as you need for any given lighting fixture--just "cut on the dotted line", so to speak. I want to make individual "fixtures", and then attach them to the electrical system. That is, I am not using grommets or brads to attach. Therefore, I have attached wire to the strip at the initial two copper connecters and will attached that wire to a plug.

to be continued ...

Wednesday, November 23, 2011

Build Update#1 2004 Oddjob Lane exterior upgrade

While I always thought that 2004 Oddjob Lane was charming straight from the box, I also always thought that I could maybe "add something to it". (This dollhouse was purchased at Odd Job Stores -- now out of business). It was a completed house just needing putting together.

Original enamel painted house.
I considered, and rejected a number of changes: add 2 inches to the back of the house (the rooms are only 11 1/2 inches deep); add an addition with a covered porch on the ground floor and an extension to the living room on the first floor; change the roof line to a true hip roof and add a room in the attic; and some others. Only the roof change is still in the running.

About a month ago, I knew what the house needed--a more elegant exterior!
  1. Stucco exterior. I used a "sand grout with glue" in Alabaster from Home Depot. This stuff goes on easily and stuck without any problem on a glossy enamel paint without sanding. Beware, though, this stuff dries hard; then corrections are almost impossible to make. The problems I had were that I could not remove the quoins, windows, nor other trim to make stucco-ing easy. Thus the finish is not exactly as smooth as I would have liked; but I am still pleased.
  2. Quoins and balusters. I painted these with Duncan stone texture paint in Sand color. This color was too dominate for the stucco color so I gave them a wash of white paint (actually a couple of washes) to tone the color down.
  3. Brickwork. The foundation of the house, full-height chimneys, the step risers, and the walkway were painted with DecoArt stone texture paint in Light Brown (really a red-brown). After it dried, I scored those areas (the house is MDF) into bricks. I could not score the chimneys. I used 1/2 inch x 3 inch pine and I had to score against the grain and it didn't work. So, brick chimneys are still up for grabs. If worse comes to worst, I will leave them as "brick-colored stucco".
  4. Porch and step treads. I painted these with DecoArt stone texture paint in Grey
  5. All the white enamel trim was repainted with a soft-white flat (real house) paint I had on-hand.
  6. Landscaping. I am using (because I had it at home) green craft styrofoam as the "form". The grass areas will be covered with either Heiki or Noch grass mat. I haven't work out the landscape design yet.
  7. The roof will be redone as a Georgian hip roof with one or two rooms in the attic.
The new look!
Closeup of porch and brickwork.

Tuesday, November 22, 2011

Ok, some more Christmas at Sunnybrook Farm

I have reviewed some more of the photos for Sunnybrook and uploaded them to Webshots also.

Since about 100 guests accepted invitations, they are everywhere in the house! I guess they will be staying awhile!

Foyer with guests arriving
Another view of foyer
Living room

Another view of living room


Dining room


Another view of dining room

Well, at least I got something done!

I keep trying to do something on my houses every day. Unfortunately, sometimes that means I just sit in front of them and daydream! I am not a procrastinator -- just a dreamer.

I am still waiting to finish the lights and landscaping at Casa Lobo but I have decided that that will have to wait for the New Year. I know where I want more lights, but the landscaping is not "talking"to me. The house takes up most of the 2 x 4 foot plywood it is on.This means that the house only has about 6 inches on each side and in the front. I think that is enough to do the landscaping. The front entry has a nice patio. --Just need somethiing for desert plants... I didn't think it would be this hard.

I decided that this year I would just decorate the inside of Sunnybrook Farm (aka The Big G). I usually do a couple of the houses, inside and out, but not this year. As a result, about 100 of my little people have gathered and are partying happily. Some haven't seen each other for years! 

I took a lot of pictures of the party but haven't finished reviewing them (I am not the world's greatest photographer). I did do a "panorama" composite of two shots using Photoshop Elements 9 and I was impressed with the result. The party is going on also in some rooms in the wings. Those and other photos shortly.

Monday, November 14, 2011

Well, a little sideways, for the mo'

I decided to stop working on finishing Oddjob Lane or Casa Lobo, probably until the new year.

I am with the little people for a while, though, since I want to decorate Sunnybrook for the holiday parties and get all the guest in place!

Then I must get myself and my real house ready for the holidays!

Sunday, November 6, 2011

Casa Lobo, somewhat neglected

I did take some pictures, but didn't like the way they turned out. I would like to blame the camera, but, alas, I think the problem is the photographer! I shall try again. I am also thinking of adding more lights but haven't followed though on that yet.

I love the brass, battery, LED chandelier that I have used, but one, it doesn't put out much light; two, it put out a garish blue toned light that I didn't like. I dabbed a spot of translucent orange Gallery Glass on the bulbs. This definitely helped. There is nothing to be done about the amount of light. Perhaps, my chandelier is a bit deffective. As I said, I love the style so I shall keep it -- great "mood" lighting!

Anyway, two of the better pictures:

Casa Lobo -interior (this is a front-opening dollhouse). The transformer and power strips are on a shelf under the landscaping board under the house and accessed from the front.
-=--=-=-
Chandelier, love it but very little light output!
-=-=-=

Saturday, October 29, 2011

Where did the days go?

I suddenly realized how long it has been since I posted. Real life certainly has ways of going down unexpected, and sometimes, unwanted, paths.

Not much was done with my dollhouses, and definitly not as much work as was needed in the garden was done. Some of that though, was due to all the rain we had which kept the soil too wet for my liking.

I have recently electrified Casa Lobo and I will be adding a few more lights, I think. I used a combination of LED battery lights, and electrifying by pulling the wires to the back of the house and putting the plugs into power strips. The power strips and the transformer are hidden under the house which is raised about 6 inches above the table for a "work area". Casa Lobo is a front-opening house.

I will take some pictures and do another post also explaining problems I ran into (what a surprise!).

Friday, May 20, 2011

Behind the Build: Westerly- The Beach Landscape

(For a complete pictorial chronicle, see the Webshots album listed on the left.)

I was certain that the Greenleaf Westville could be bashed into a wonderful beach house. What I wasn’t certain about was how to build a beach. However, I did know that the landscape and house had to fit on a base not larger than 4 x 4 foot. Fortunately, the new footprint of the Westville was only about 34" x 14" so there would be areas for grass, beach, and ocean. I allotted 24"for house and grass, 12" for sandy slope, and the rest for beach and water. I named the house Westerly.

In order to have a slope down to the water, I built a 2 1/2" tall platform for the house and grass, and in front of this I glued a 2 ½" tall x 12" deep x 48" piece of Styrofoam in a stepped fashion. Part of this would be a level planting area and part would be the sandy slope. I glued a ½ inch tall x 24 inch deep x 48 inch long piece of builder’s foam over it for a planting base. I used a Noch brand grass roll from a train store for the level grassy area.

... ...

This sandy slope would go down to a flatter sandy area going into the water. Now to make that surface I needed to make and carve an uneven slope. To help make the slope I sprayed the “sandy” area with uneven levels of Great Stuff expandable foam insulation. After this was dry I carved a rolling and curved slope. This was not as easy as I thought. The foam dried very hard. When I had the surface I liked, I cut into it to place the wooden steps to the flat beach. I then painted the sand a “sand” color, darker by the wet edge, and lighter up the slope. After this was dry, I sprayed the sand with glue and sprinkled play sand over it all. I touched up as needed.

... ...

I decided that I would not use resin water but simply paint water on the plywood with colored, thick, semi-gloss acrylic paint in various shades of blue and green with white “foam” over a sand-colored area.

Now I needed to place some plants and birds.

I made a stone wall around the house for a shrub and flower area, and picked out other areas for beach vegetation. I used purchased, and my own mini plants, and placed them around. I bought a wooden slat and wire fence and placed it on the sand dune as a “sand stabilizer” fence. I added some plant residue here and there along the sand to indicate the stuff that washes up with the waves. Then I placed different varieties of birds in the scene.

Now I just needed to have a beach party!.. ...

I dressed some little people in shorts and bathing suits, and I even bought two doll kits with “bare feet”! I set up a barbeque and eating area and let everyone have a good time – ah, those hazy, lazy, hot and humid days of summer!

Behind the Build: Westerly- Kit bash of GL Westville

Original Westville

Westerly


(For a complete pictorial chronicle, see the Webshots album listed on the left.)

My helpers were very skeptical with what I could do with this house. My sister who refuses to work with 1/8" plywood, said she would buy the furniture if I could get this done. My husband wasn't sure if / how this was going to work out. I had an idea; I didn't think it was going to be easy -- and of course, it wasn't. By the time I worked out my list of "must haves" there were a lot of changes to be made.

The Greenleaf Westville is a very nice-looking house. For those who can leave well-enough alone, or only want to make a small change, the build should go fairly smoothly. I liked the "bones" of the house, I just thought it needed to be more of a house, a summer Nantucket seashore looking house.
... I wanted a larger house.
... I wanted an open plan first floor
... I wanted a large porch across the front on the first and second floors.
... I wanted the chimney to be in line with a fireplace.
... I wanted a more interesting and open staircase.
... I wanted a second floor hall so that rooms (especially the bathroom) could be private!
... I realized that the bedroom furniture would be hard to place without some decent wall space.
... I wanted doors to the second floor porch.
... I did not like that the house roof line almost reached the roof of the porch and those tiny "on the floor windows" under that roof line. It looked claustrophobic! It looked dangerous! It looked like the builder miscalculated!

Fortunately, the Westville had a depth that was usable for my design but the length needed 10 inches. In retrospect, I should have added 12 inches.
~~Exterior:

I raised the roof and added full sized windows. I added a large bedroom dormer. I added a large chimney and stuccoed it. The house has grey clapboards with white trim. I added a porch across the entire second floor front with doors to it from the bedroom and the den; and across 2/3 of the first. I added some nice columns and steps. This house front is made for sitting and relaxing and watching the ocean! In fact, the whole house is made for seaside fun!

The beginnings of the interior:

To this:

~~The Main Floor:
...A completely open space was made. I put a fireplace (and its chimney) on an outside wall in the "living room".

...The kitchen appliances were put along the bay window on the other side.


... I bought the narrowest stair I could find and turned the stair to face the back of the house. This allowed me to make a nice open, flying staircase and put a buffet under it. To keep the staircase as narrow as possible, I used 1/16 inch dowels as spindles and put them on the outside of the stairs so that the little people would have some room on the stairs for themselves. The upstairs hall would be narrow, too.


~~The Second Floor:

...The upstairs has three rooms (den, bathroom, and bedroom) and a stair hall.

...The height of the second floor in front was much too short, so I had to add to make the wall 8 inches tall. Then I had to make the little windows in front regular size windows. And I had to raise the roof line -- this was not easy since it affected the adjoining roof line of the bedroom.

...I added a balcony door in the bedroom and in the den. I added a dormer in the bedroom. I gave the den a ceiling to the roof and I should have done this in the bedroom also -- a peaked ceiling is so interesting.

...I should not have made the stairwell have a walkway next to the stairs. I should have made the "hallway" in the front of the house. Then the bathroom could have been pulled to the back and its door to the "hall" visible. The room I would have gained by not having a walkway next to the stairs would have added a couple of inches to the width of the den --which could have used it.

I thought of this too late; I was to0 excited about my hall. The door to the den would have been to the hall in front of the house. It is cute to have the hall across the back and see the doors opening to it, but doesn't add that much. The removable wall with the bathroom door is still waiting to be done.

Finishing touches need to be done.
~~~~~~~~~~~~~~~~~~~~~~~~~~~~~~~~~~~~~~~~~
~~~~~~~~~~~~~~~~~~~~~~~~~~~~~~~~~~~~~~~~~

The beach landscape is discussed in its own Westerly "Behind the Build" post.

Westerly- The Beach Cottage of Sarah Spencer & Franklin Wells, Maryland coast


********************************************************* Sarah Victoria Spencer & Franklin Eric Wells: Biographical Information
.........
***********************************************************
Sarah is the daughter of Abigail...... and......Samuel Spencer of Williamsburg, Virginia (see Abigail’s Teashop & Bakery). She has a younger sister Robin...... a physicist at the John Hopkins Applied Physics Lab.

Sarah was in her sophomore year at the University of Chicago and was still wondering what to do with her life. As she became more and more interested astronomy, she started to wonder if she could be an astronaut and fly amongst the stars. Before she knew it, she applied to the Air Force Academy. After intensive pre-processing, she was accepted. She finally found her milieu—she loved flying. She is now a pilot in the Air Force and is currently stationed at Andrews Air Force Base in Maryland. She has logged combat hours and has been part of the Air Force One Flight crew. Sarah has recently been promoted to Captain.
~~~~~~~~~~~~~~~~~~~~~~~~~~~~~~~~~~~~~~~~~~~~~~~~~~~~~
~~~~~~~~~~~~~~~~~~~~~~~~~~~~~~~~~~~~~~~~~~~~~~~~~~~~~


Franklin is the son of Helen... ... and Arthur...... Wells of Silver Spring, Maryland. He has an older sister Dorothea......(see 2004 OddJob Lane) and an older brother George...... (see Original Rowbottom Manse).

Franklin attended the University of Pennsylvania and then Johns Hopkins specializing in infectious diseases and pulmonary surgery. After working for the Center for Disease Control, he joined Doctors without Borders. While treating military personnel, Franklin decided he could best serve by being with the troops in the field. He is now a Major in the Air Force and is presently stationed at Andrews Air Force Base.

For reasons that are still classified, Franklin was asked to join the crew of Air Force One......on one of its lengthier flights. Sarah Spencer was also on the crew. The trip went well and on the way back there was ample time for everyone to get to know one another. Also on the flight was Angus MacPherson......(see MacPherson Farm) as CIA liaison. This gave everyone something to think about and nothing to talk about.

Sarah and Franklin kept up their friendship between separations for military business. Their friendship flourished into romance and in 2000, they married at the Air Force Chapel in Colorado Springs....

In 2001, they decided that while living at Andrews was fine, they wanted a vacation home and bought and renovated a “get-away” cottage on the Maryland shore. Their family and friends loved this idea and the cottage quickly became very popular. Thus the “get-away” became the “get-together”! Shortly, they truly understood how important this all was as they both became involved in the Afghan War.

Tuesday, May 17, 2011

2004 Odd Job Lane- The Queen Anne Townhouse of Dorothea & Edmond Rumford, Alexandria, Virginia


*************************************************************
Dorothea Therese Wells & Edmond (Ned) Paul Rumford: Biographical Information
......
*************************************************************
Dorothea is the daughter of Helen (Duffy) & Arthur Wells. Arthur is the owner and publisher of the Daily Chronical, a position he took over when his father retired. The newspaper has been in the family since Arthur's grandfather left politics, bought the paper, and moved his family from Boston to Potomac, Maryland. Duffy is a professor of Political Science at the University of Maryland. Her family has always lived in Maryland and her parents are retired professors. It seems that Duffy also followed a family tradition! Arthur and Duffy meet as students at UM, and even Duffy worked at the newspaper while going to grad school.

Dorothea has two older brothers: Franklin (Johns Hopkins U.), is a surgeon and a Major in the Air Force, and George (UVA) is a partner with Derek Rowbottom in their architecture & landscape firm, Potomac Landscapes. Dorothea and her brothers grew up in the womderful older home in Silver Spring, Maryland...... where their parents still reside.

Dorothea decided to check out her Bostonian roots and to study Literature at Havard. She chose to live in Boston after graduation and to work at the same newspaper as her great-grandfather had so many years ago. She really thought she would stay in Boston forever until she came home one summer and met Ned Runford at a Derek Rowbottom party. As they say, the rest is history. She and Ned married and settled in Alexandria. One day, she realized that she would like to write children's books. Much to her delight, she now writes children's books-- books that are often illustrated by her good friend Rebecca Rowbottom .
~~~~~~~~~~~~~~~~~~~~~~~~~~~~~~~~~~~~~~~~~~~~~~~~~~~~~
~~~~~~~~~~~~~~~~~~~~~~~~~~~~~~~~~~~~~~~~~~~~~~~~~~~~~


Edmond, usually called Ned, is the son of Arlene and Douglas Rumford. His father is a founding attorney of Spencer, Mason, & Rumford, a firm specializing in Estate Planning with offices in Williamsburg and Fairfax, Virginia; and Washington DC. His mother is Head of the Science Department at Fairfax High School. Douglas and Arlene met when they were both undergrads at American Univerity in DC.

Ned's younger brother John is a graduate of the Curtis Institute and a clarinetist with the Washington DC Symphony Orchestra; his younger sister Nina has a degree from Georgetown U. Law and is an attorney, also. Ned and his siblings grew up in a c.1850 classic revival home  in Fairfax, Virginia where his mother grew up and his parents still reside.

Ned followed in his father's footsteps, obtained a law degree from Stanford, and then joined the firm. He handles the multi-faceted legal work for Potomic Landscapes and for Rebecca's endeavor's. Between both of these, Ned is quite busy. He pretends to grumble, but he enjoys every minute and does a bit of traveling as a result of the business needs.

As Virginians, the Rumfords like to tease the Wells family about having "Yankees" roots!